Saturday, October 8, 2011

Vintage Chair transformed into Pet Bed


For the first six months of 2011, my husband's job was moved to San Francisco. So on weekends or various weeks through out that time I spent with him exploring the area. We went to this little flea market that was under an overpass, almost in downtown. 
This is the chair bought in a flea market in San Francisco. 
So I bought this beauty of a chair and my dear husband packet it to my little car. Needless to say the rest of the trip and all the way home my car smelled like "old man" as my husband would describe it. 
I had bought the magazine "100 Ideas Flea Market Style" 2011 by Better Homes and Gardens. Inside they had this photo of a chair that they had transformed into a dog bed. I had to create a pet bed with this chair.  Mr. KofColors was going to have fun creating this pet project. 
Taking the chair apart. That is Mr. KofColors.

He is so strong!
This is where my "Mr.Right" did most of the work (another great reason why I married him). What can I say, he doesn't trust me with the sharp power tools (neither do I). He took apart the chair piece by piece. 
Keep the small decorative pieces, don't throw anything away. 

Here is the headboard for the pet bed. 
This project took a couple of weeks. Mostly because Mr. KofColors worked on it when he felt like it. Also, I don't like to bother him when he is working so my pictures were taken when he wasn't in the garage. :-)


Layout of what the bed was going to look like. 
So after weeks of anticipation, a few trips to the hardware store and Mr. KofColors buying a table saw "because I need it to finish your bed". 

TAAA DAAA!
Finished pet bed. 
This is my little "Meja" trying out the creation. 


I would have liked to give you more of a description of exactly how he made it but I really don't mess with him when he is working. But all I can say is that Mr. KofColors is AMAZING. 


Here is my princess. I made a removable pet bed with matching pillow and blanket. 
"Mom, trying to get some beauty rest!"


If you have any questions, please let me know. I would be happy to ask him for you and respond promptly. He is amazing and I am so proud of his work. 


~Amanda

Going to submit this project for the CSI project as my best project of 2011. 


Thursday, September 22, 2011

Easy as "Layer Cake" Queen Quilt

Pieced before being quilted.
I love to sew...EVERYTHING! So when the quilting bug starts to bite I just love to use precuts. Instantly I fell in love with "Farmyard" by Sentimental Studios for Moda Fabrics. I purchased this amazing layer cake from The Knotted Bobbin, where you can find a great selection of precuts at amazing prices. 

Thursday, September 1, 2011

Jelly Jar Foaming Soap Dispensers


Nothing like the smells of Fall. This is my favorite time of year and  I just love to make jam and apple pie, decorate using pumpkins, splurge on that apple pie scented candle and order the Pumpkin Spice Latte from Starbucks. 

Friday, August 26, 2011

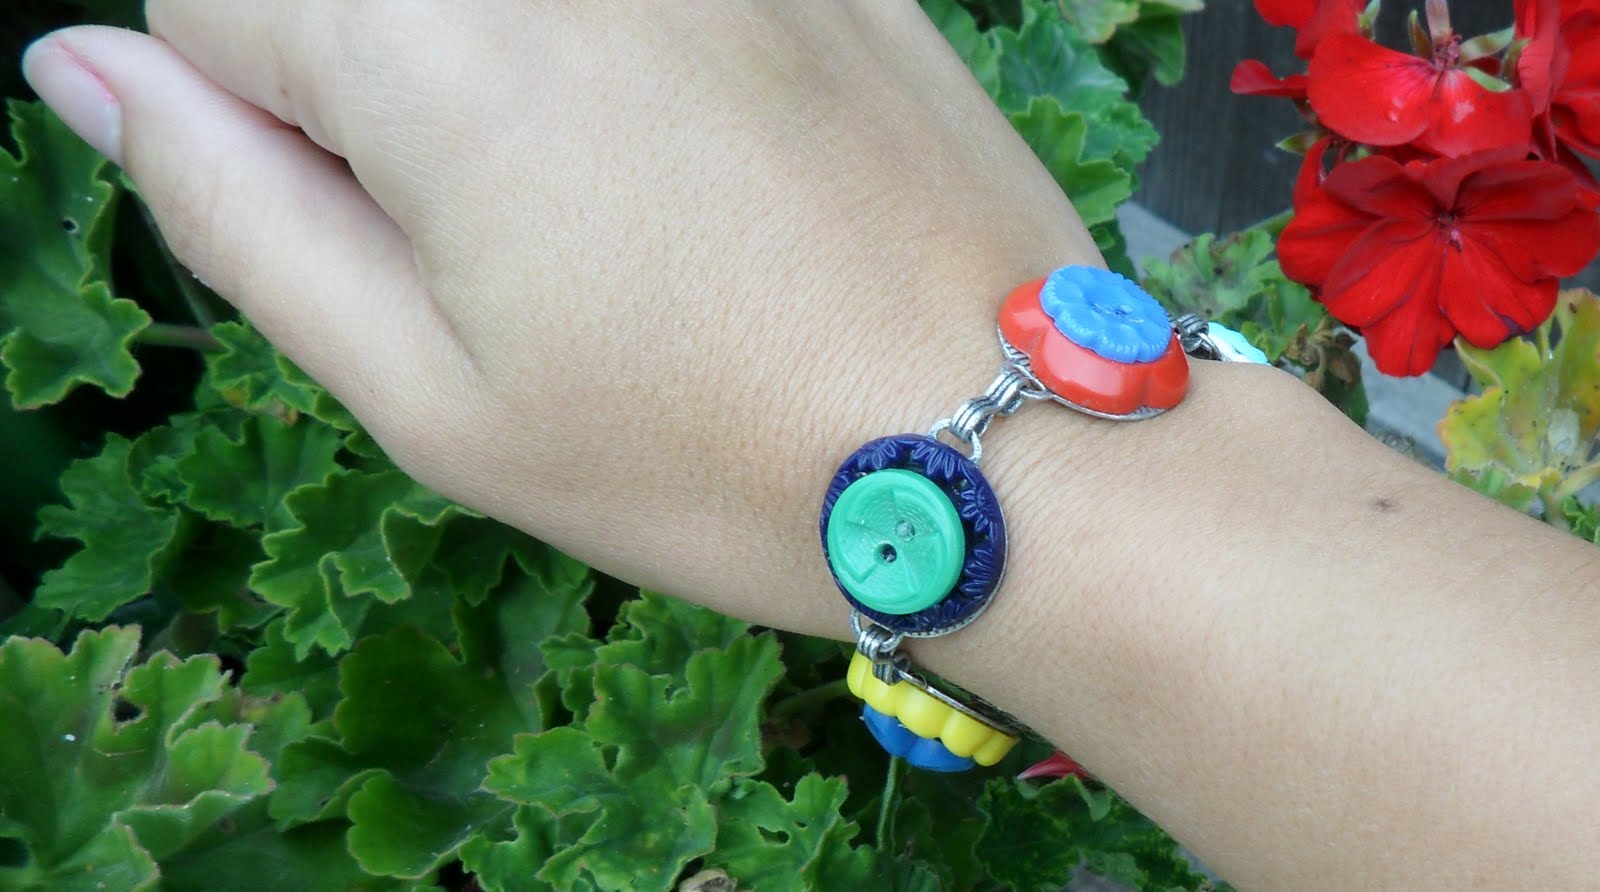
Bracelets Using Vintage Buttons and Earrings


This is an idea that I picked up from a local flea market. A lady was selling kits using regular shell buttons. I thought I would make it into my own by digging into my ever growing stash of vintage buttons and earrings.
Supplies:
                 * E-6000 Industrial Adhesive (found at Michaels)
                 * Bracelet findings and toggles (also at Michaels)
                 * Wire or bolt cutters (from my toolbox)
                 * Vintage buttons and/or Earrings
                 * M&M's (we are crafting...may need a chocolate fix!)

Take off the backs of the earrings by using the wire or bolt cutters. 

Do this to all of your earrings and or buttons with backs. 
Lay out your buttons/earrings to your liking for a bracelets. 
Using the E-6000 put the glue on the bracelet and the earrings following the labels instructions. 
After letting the glue cure for two minutes I put the pieces together. Depending on the world around you, I left mine to dry for 72 hours for best results. 

This is the kit that I purchased at the flea market using shell and flower buttons. 
This is using some cute vintage buttons that I have purchased from the Vintage Recycler
I buy a lot of my vintage buttons from The Vintage Recycler on Etsy. Check out her great selection on some absolutely beautiful vintage buttons. 
Again, digging into my button stash...I made this for my mom. 

This isn't dry just yet...but I flipped it over so you can see the earring version of this bracelet. 

This one is my favorite using my colorful vintage buttons from the Vintage Recycler. 

Thursday, August 11, 2011

Beach Bottles from Shabby Beach Nest

Nicole at the Shabby Beach Nest did a Beachified Blue Bottles Tutorial  that she posted on "Think Pink Sunday" and I just fell in love! She also lives on the California coast just down the way in Laguna. 
Her tutorial was lovely and easy to follow, I instantly pulled out some clear wine bottles out of the recycle bin and got to work to try to create my own beachy bottles.  Take a look at what I created. 

This is the "Beachy" guest bathroom
The guest bathroom has a lovely walk in shower that is rarely used. When we moved in, the bathroom needed a makeover so I painted one wall ocean blue and the other walls cream. A large shelf and hooks hold heavy beach towels when returning from the beach. 
I used four different shades of blue. 
 It took me some time but I drank a lot of cream soda in glass bottles to get enough to fill the area, let's just say I liked drinking the wine better. Using four different types of paint I have created the beach effect I was looking for. 
When the sun hits the window it casts a blue light in the bathroom. 
I will add with Nicole's tutorial, when I put the wine bottles in the oven I did lay them on the side on a cookie sheet that was covered in aluminum foil. 


Thanks so much Nicole for such a wonderful tutorial and inspiring me to create a beach bathroom oasis! 

Friday, July 22, 2011

"Anthropologie" Knock-Off Apron


Okay, Anthropologie is one of my favorite stores but I have never actually bought anything because I know I can go home and make something similar or better. In this case I fell in love with this "Sewing Basket Kid's Apron" that was online ($24.00).  Why should cute things be only for kids, I was bound and determined to make my own version of this apron.

Saturday, July 16, 2011

Vintage Linen Shoulder Bag


I had bought this adorable, worn table linen at the local flea market because I loved the colors and the pattern. But with a lot of the treasures that have been collected over time, I really wanted to enjoy it rather than keep it in a drawer. 

Viola! Lets make it into a bag so that I can carry it to the store, thrifting, or farmers market. That way I can enjoy it more often and carry my goodies too!