Wednesday, June 27, 2012

You're a Grand Old Flag Wreath


One of the fastest holiday wreaths that I have ever put together. With only FOUR things that you need to complete the project, this can be done right before your Fourth of July party. 

What you need is:
a grapevine wreath, mine was 30"
a retired flag, I purchased a well worn flag at a thrift store
raffia
Star, you can either buy a metal star, I used a wood one
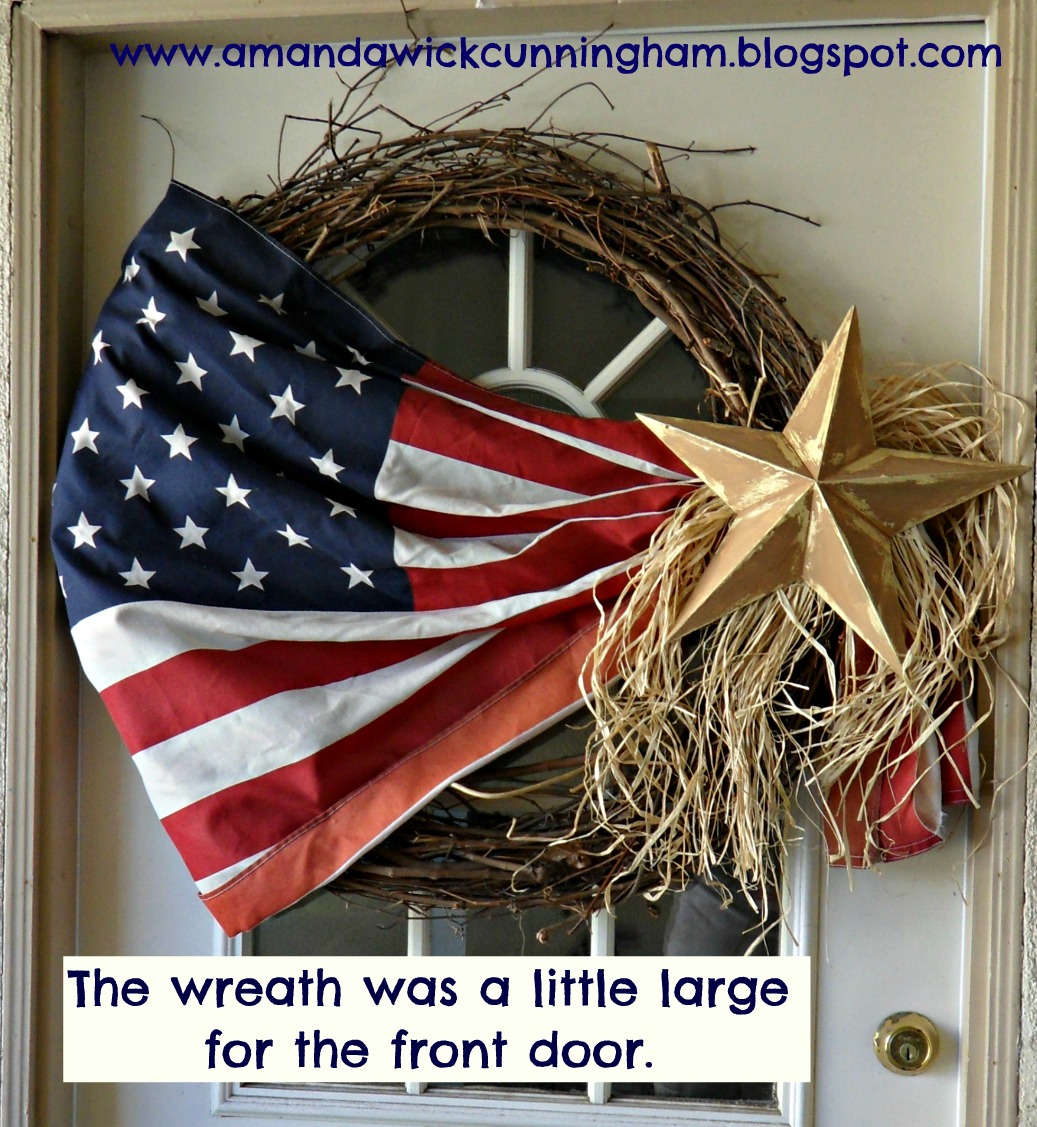
All I did was wrap the flag around one part of the wreath and used safety pins to hold in place. 
Then joining the end of the flag at the opposite end of the wreath and tying with the raffia. 
After painting/distressing the wood star, I hot glued the Star in place to the raffia knots. 

The only problem I had was "where to display"? I tried my front door, but it was too large. The front gate was also an option, but I didn't want anyone to steal it. (Maybe I will move it out to the front on the Fourth of July)
My favorite place was above my fireplace in my living room. There is a light that illuminates the wreath at night and it really looks beautiful (see below). 

Hope you make your own wreath, let me know if you do, I would love to see them. Fourth of July is one of my favorite holidays. 

~Amanda

Friday, June 22, 2012

Pinned #10: Cinnamon Roll Cookie Bars


Pinterest Stats for Week #10:
29 Boards
1522 Pins 
248 Likes

I ran across this delicious recipe on Pinterest. It is from Anna at Blissful Whimsy. You can find the recipe:


This is such a simple recipe, with so few ingredients and takes no time at all. When I made these my house smelled like "Cinnabon" and my mouth was drooling. 
I would add an extra tablespoon of milk when making the frosting.  Also, spreading the batter in the pan is DEFINITELY an arm workout. 

Enjoy!
~Amanda


Wednesday, June 20, 2012

Freedom Flowers


If you remember way back in March, I purchased this crate with my mom and did an Spring centerpiece. If not you can find it HERE

This crate has endless possibilities for floral arrangements and what a better holiday to display some great summer flowers than for the Fourth of July. 

Friday, June 15, 2012

Pinned #9: Itty Bitty Baby Dress


My Pinterest Stats for Week #9
29 Boards
1503 Pins
237 Likes

My best friend Amy has the most adorable children. I just love them and like to spoil them every chance possible. Her littlest princess was making her first trip to Disneyland and I wanted to make her an extra special dress. 


The Itty Bitty Baby Dress from Made-by-Rae.com is on my Baby Stuff Pinboard. It is a free pattern for sizes newborn to six months. 

The first dress attempted was the largest size, but it was a little tight around the chest. 

Monday, June 11, 2012

Canning: Cracked Black Pepper & Lime Corn Relish


One time, sitting at a wine bar, I struck up a conversation with a lady about canning vegetables. She was shocked that someone my age canned food, and from that moment on, she referred to me as the "Canning Girl". 


I do a lot of things that most girls my age wouldn't normally think of doing. It is these small things that make me "Amanda", so yes- I "can" vegetables and make jam, have a whole room devoted to sewing and would rather spend my money on some great vintage clothing than buy something new. Oh...and I am handy with tools.  


So recently I made this relish because corn was in season and on sale. What a better way to start the summer by sweating your butt off in the kitchen. :-)

From: Farmers' Market Cookbook (2010) Vegetariantimes.com


Ingredients:


2 medium onions, peeled and quartered
1 large green bell pepper, seeded and quartered
4 cloves of garlic, peeled
6 cups fresh corn kernels ( from 6 ears of corn )
1 1/2 cups sugar
1 cup vinegar
1/2 cup lime juice
2 tablespoons kosher salt or coarse sea salt ( not iodized )
4 bay leaves
1 lime, halved and sliced
1 tablespoon cracked black pepper


Chop onions, bell pepper and garlic in food processor or blender until juice and almost paste-like. Stir together corn, sugar, vinegar, lime juice, salt, bay leaves, onion mixture, and 1 1/4 cups water in a large stainless steel pot. Bring to a boil. Reduce heat to medium low, and simmer 20 minutes, stirring often. Add lime slices, and continue to simmer 10 more minutes, or until mixture has thickened. Before putting in jars stir in cracked black pepper.
Sterilize 4-8 oz. jars and lids. Remove jars one at a time from hot water. Fill jars with relish, leaving 1/4-inch headspace, and dividing lime slices and bay leaves among jars. Seal and process in boiling-water bath. 


I found these great labels for the lids, they have labels for jams and vegetables. 
Garden Fresh Canning Jar Labels from Ink Tree Press at Worldlabel.com

Need some help with the basics of canning?

Have no fear! Canning 101: The Basics from Simple Bites will help you get started. If you need more help or have questions, please message me. 


Happy Canning!
~Amanda