


This is an idea that I picked up from a local flea market. A lady was selling kits using regular shell buttons. I thought I would make it into my own by digging into my ever growing stash of vintage buttons and earrings.

Supplies:
* E-6000 Industrial Adhesive (found at Michaels)
* Bracelet findings and toggles (also at Michaels)
* Wire or bolt cutters (from my toolbox)
* Vintage buttons and/or Earrings
* M&M's (we are crafting...may need a chocolate fix!)

Take off the backs of the earrings by using the wire or bolt cutters.

Do this to all of your earrings and or buttons with backs.

Lay out your buttons/earrings to your liking for a bracelets.

Using the E-6000 put the glue on the bracelet and the earrings following the labels instructions.

After letting the glue cure for two minutes I put the pieces together. Depending on the world around you, I left mine to dry for 72 hours for best results.
 |
| This is the kit that I purchased at the flea market using shell and flower buttons. |
 |
| This is using some cute vintage buttons that I have purchased from the Vintage Recycler I buy a lot of my vintage buttons from The Vintage Recycler on Etsy. Check out her great selection on some absolutely beautiful vintage buttons. |
 |
| Again, digging into my button stash...I made this for my mom. |
 |
| This isn't dry just yet...but I flipped it over so you can see the earring version of this bracelet. |
 |
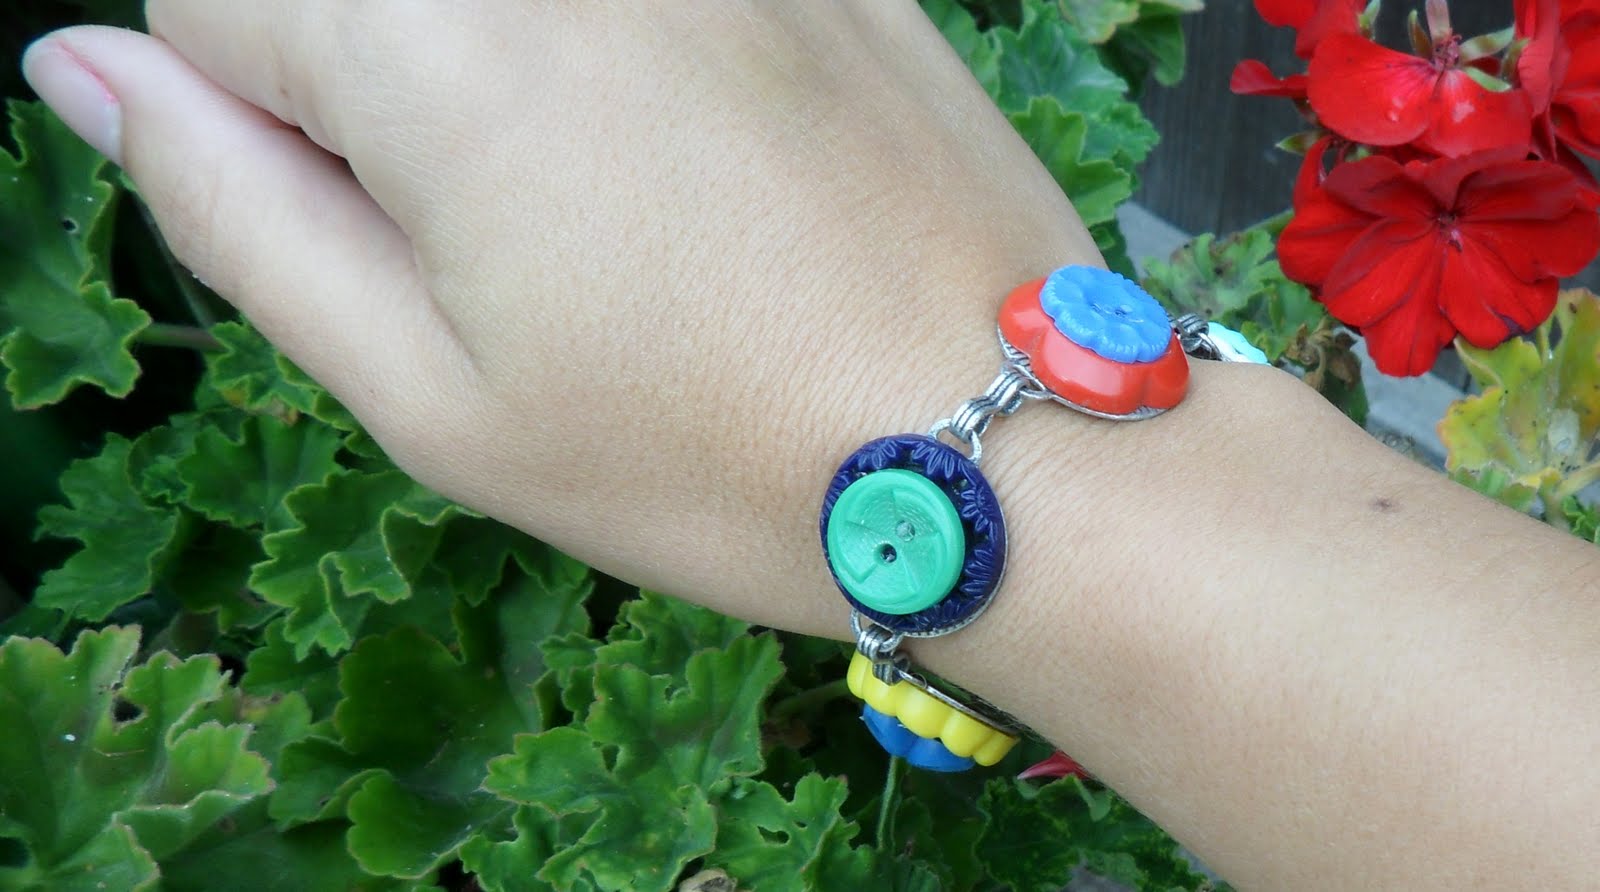
| This one is my favorite using my colorful vintage buttons from the Vintage Recycler. |


